Total Pageviews

Monday, 24 February 2014

Ribbons & Bows - Monday 24th February 2014

Hello Friends,

Before I start my post today, I would like to offer a big welcome to my latest follower,  1cardcreator. Thank you so much for choosing to follow me!

Today I have two cards which I made for this month's Design Team project for Fantastic Ribbons - we were asked to make a card/project where we have sewn the ribbons. I had these colours to work with (very Spring/Summer) and I chose to go for fun, colourful designs.

 For the first card I went OTT with the ribbons - sewing a running stitch through the orange ribbon and then gathering to form a ruched effect. With the yellow, I just stitched at intervals to overlap the ribbon lengthways.

I used papers from my stash and also stitched around the edge of the bottom layer.
I used the same ribbons for the second card - the pink ribbon is already stitched: although you can't see it, I sewed the little banners along the width of the card and then covered with the pink ribbon. I made the flower with the little bits left over, sewing them together in the middle.

That's it from me for today Friends, thank you so much for stopping by! Why not visit Fantastic Ribbons for a wonderful selection of ribbons, lace, Washi Tape and buttons?

Love and Hugs,
Carole X

Friday, 21 February 2014

Sunday Stampers Week 295 - Birds - Friday 21st February

Hello Friends,

It's Sunday Stampers time again...this is a weekly challenge set by Hels Sheridan: all the deets can be found on Hels' totally inspirational blog - here -

The challenge this week is 'birds': now I like birds..a lot... and I have lots of bird stamps, but I decided on this Steampunk Owl stamp, by Stampendous, which I hadn't used in a while, for my card this week.


I stamped him with black archival and heat embossed with clear powder, before colouring with Promarkers..then I cut him out.

I created the background using a Memory Box Garden Birch Trees stencil, which I inked through with a mixture of Black Soot and Chipped Sapphire Distress inks on to white card. I then die cut a Spellbinders Scalloped Ovals die, lay it on the card and matched the stencil to the background, so that I could ink through again, just part of the image. This time I just used Chipped Sapphire to leave the die cut slightly lighter than the background. I attached this to the card with 3-D foam squares and then added the owl, again with foam squares.

The card is finished off with a tied blue ribbon and a steampunk clock charm.

A quick post today, after yesterday's rather lengthy and photo heavy Craft Caddy..but thanks for all the comments and for those who stopped by after Christine posted it on her Facebook page.

Thank you so much for stopping by!

Love and Hugs,
Carole X

Thursday, 20 February 2014

Craft Caddy - Thursday 20th February 2014

Good Morning Friends,

Since going to Stitches with Amy on Monday, I've had some holiday from work and I have no idea where the time has gone! But with Tom at work, being home alone (except for the hens), I did manage quite a bit of crafting time...

Tuesday (and about an hour on Wednesday), was spent making this craft caddy box and then decorating it. The box kit comes in pieces to be put together and I bought it as one of Christine Emberson's Charity kits, being sold in aid of Ronald MacDonald House and The Royal Marsden and is available from Christine's site  here.

Before putting it together I decided to give all the pieces a base layer of matt paint; there were a lot of pieces, so I mixed some ivory paint from a tester pot with a little Paper Artsy 'Mermaid' Fresco Finish paint. Although the paint dried quickly, it took a while to paint all the pieces. Once it was all dry (I left it all day to be sure), I started to glue it together. I used Cosmic Shimmer, but it was important to let each piece thoroughly dry so that the box was strong enough when put together - I am now really wishing I had taken photos along the way!

Once the box, which comprises a top opening box tray and two drawers, was put together and the glue had completely dried, I gave it a top coat of colour, this time using Fresco Finish: Blue Pacific. I chose these colours, because the papers I was using (by Teresa Collins and included in the kit) were a red/torquoise pattern.

I had measured and cut the paper sizes before putting the box together and had also inked the edges with Aged Mahogany distress ink. When the paint was dry, I stuck the papers to the caddy. 

Once all the papers had been glued on and left to dry, I gave it a coat of Mod Podge matt to finish and seal. I have been using this product for years and love it.

There were some paper pieces left over, so I decided to decorate the top of the box with die cut flowers, which I made using Spellbinders dies: Spiral Blososm One,Blooms Four, Bitty Blossoms, and Carnation Creations. I inked the edges of all the petals with Aged Mahogany.

The flowers were arranged on the lid of the box and I also added turquoise lace and pale pink beads to the edge of the lid in front of the flowers.

I didn't want to over do the decoration, after all this is to be a 'working' box, but I did decide to add some further decoration to the front. The gorgeous handles/knobs come with the kit, I love them!

Box from the side
I used a die,  Spellbinders Ironworks Accents (one of the first dies I bought and haven't used in ages!) and cut 6 corner shapes using craft metal. I then dipped them individually into embossing ink and dusted with some coarse embossing powder. It's a pot that has been in my drawer for years and is a bit like distress embossing powder, but a little finer. I chose it more for the colour than anything. I was really pleased with the die cuts once heat embossed: they look and feel like coloured metal.

with lid open


The lid opens at the top to reveal a storage tray; I added some floral paper from stash to the base of this and all the drawers. I am still trying to decide on the inside of the lid, a little bit late but I had thought of stamping a flower or sentiment on it..guess I still could!

So there it is! A new caddy for my craft room...but what to keep in it? I think it might be placed in the sewing part of the room for cotton reels etc, rather than for paper craft.

That's all for today, thank you so much for stopping by!

Love and Hugs,
Carole X


Tuesday, 18 February 2014

Stitches.... Tuesday 18th February 2014

Good morning Friends,

Just a quick-ish post today...yesterday I had a great day with my friend Amy up at the Craft, Hobby & Stitch retail show at the NEC. We came away with new ideas 'overdrive', our heads were buzzing so much. So many fabulous examples of crafts and cards, especially from one of my favourite Companies, Paperartsy...but also Lavinia Stamps, Woodware and Creative Expressions to name but a few.

I'd arranged that we would meet up with the lovely Christine Emberson, who together with her fellow Spellbinders DT member Yvonne from the Netherlands, was still excited (of course) by the 2 awards they collected on behalf of Spellbinders at the previous night's ceremony. It was so nice to catch up with her.

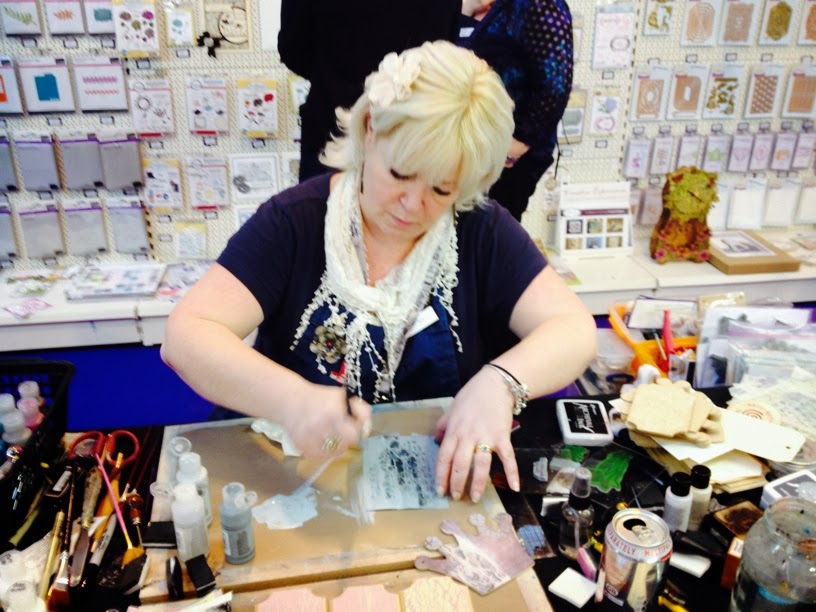
We also had a nice chat with Julia Watts and I spent ages with Hels, being shown some of the lovely new paint and crackle medium products being brought out by Creative Expressions. Ali Reeve and Sue Wilson were busy demoing too and it was great to see Sue's new dies close up...as well as the beautiful cards she has been showing on her blog recently. Ali was chatting to some others all the time we were there, so I didn't get the chance to catch up on the lives of our hens!

We came away with lots of ideas for future workshops and of course, we wanted it all...but wanting and getting are two very different things!

Below are some very quickly snapped-with-my-phone shots from the Sizzix stand, which always has a lovely display (though we both thought last year's was better). The first two are Tim Holz's display (sadly he was in South Africa not Birmingham!)


A retro 50's feel with these new dies, which I liked a lot

Some lovely Vintage creations


Hels Sheridan demoing some lush new paint products for Creative Expressions


I have two days off now to catch up with some crafting, but first of all..yes..need to find some space to work in the craft room!

Before I go, thank you for all your comments on yesterday's 'white on white' - effectively a simple but time consuming card as there were a lot of die-cut elements and particularly as I also decorated the INSIDE, which I failed to add the photo of to my post! I have added it now..but to save you looking back, here, my friends is the inside of yesterday's card!!!


Bye for now and hope you get some crafting time today,

 Love and Hugs,
Carole X

Sunday, 16 February 2014

Simple things... Sunday 16th February 2014

Good Morning Friends,

Hope you are all having a good weekend and at last today we have beautiful sunshine! The hens are in the garden clucking away happily, soaking up the sun.

 It has been a bit 'busy' here, out and about quite a lot yesterday and also Friday, when we had theatre tickets...it wasn't planned as a Valentine 'thing' but it was an opera so they only perform one evening. I got the bus into Bristol..what an awful day and a horrible journey; it should have taken 50 minutes but took a little longer and felt a whole lot longer!

I was due to meet Tom in the  City Centre at about 5.30pm (he works another 20 minutes out of town the other side), but my bus got in at 4pm, so I had a bit of a wait. I battled against the ever increasing wind and rain to St Nicholas Market, a covered market where there is a lovely little haberdashery shop. I don't get down there that much and I needed some cottons - whilst there of course, I also succumbed to ribbon. It is a real treasure trove of ribbon, once in, you just don't want to leave!

Having met Tom we went for a pre-theatre meal in one of our favourite restaurants, (that we don't get much chance to visit), on the Quayside. They serve locally/West Country sourced food and it is gorgeous..as we sat in the comfort of the restaurant we could hear the wind really getting up speed and the boats moored there were bobbing about frantically. Some of them are barges and people live on them, I was so pleased I didn't!

The journey home post theatre was very windy, pretty unnerving on the roads once we left town and that night it just didn't let up, was it like that with you? I think it's the first night this year that it actually kept me awake! But I'm mindful of not complaining too much, our neighbouring Counties of Somerset and Gloucestershire, not to mention further South in the UK,  as well as where Tom's relatives live around Venice and across the pond in the USA, have been battered beyond belief for weeks now and I can't even begin to comprehend all that.

Anyway, less of my ramblings and on to craft...in case you missed yesterday, dear blog friend Patricia won my blog Candy, which I will be posting off next week. If you don't already follow Patricia, do hop over and take a look - Summerhouse Crafts - because she makes the most beautiful cards - and boxes!

Today's card is a white on white card that I made  as part of my 'stock' for an upcoming craft fair. It's a 7x7 card, a size I have got to like a lot lately. I really like small cards and generally make 6x6 as my usual size of choice, saving the larger 8x8 for commissions. At the moment, I am not generally taking commissions because I don't want to take on too much. However, at Tom's office I have a lot of regular customers, who have been ordering from me for a long time, so I am still making cards for them and others for whom I've been making cards for a while now.

Interestingly, I sent an email around those at Tom's office offering a slightly smaller 7x7 if they wished - the take up has been great.


I embossed a piece of white card measuring slightly less that the 7x7,  die cut the roses from Spellbinders Bitty Blossoms and the flourishes are a Sizzix die. The sentiment is  a digital by Pink Petticoat, (I've been buying digital stamps from here for years, they are really fresh and modern and right now a lot of the old images are being retired, so take a look!) die cut on a Labels Four Small Spellbinders die...so no stamping, inking, just simple embossing and die-cutting.


The inside of the card:


Thanks for stopping by and have a fab Sunday,

Love and Hugs,
Carole X

Saturday, 15 February 2014

We have a winner! - Saturday 15th February

Good afternoon Friends,

Well as promised we did the 70 follower draw yesterday -it wasn't scientific but it was fair..all your names, whether in the UK or abroad were put into a hat and Tom dipped his hand in... and the name he pulled out is...drumroll.... my lovely blog friend from Scotland:


Patricia Duffy !!!


Well done  Patricia  and thank you so much for choosing to follow me! Please email me at wonder8art@aol.com with your address and I'll get a little prize posted off to you. I meant to take a photo of the big occasion put believe me, we finally did it about Midnight as we had been out all evening! 

Sorry to be so late posting, we've been out all day...I'll be back tomorrow with a card and to catch up with all your lovely creations...hope you are all having a great weekend,

Love and Hugs,
Carole X


Friday, 14 February 2014

Sunday Stampers Week 294 -Diamonds

Hello again Friends..goodness twice in a day!

As promised I'm back with this week's Sunday Stampers challenge project. Sunday Stampers is a weekly challenge set by wonderfully inspirational crafter Hels Sheridan - to check out all the deets click here

This week Hels set the theme of Diamonds, so I as I'm not a particularly 'blingy' crafter, I immediately turned to my Harlequin stamp by Indigo Blu, but what to do? I decided to make a wall hanging and  return to the chalkboard technique I used on my 'Tom's Tag' this month.

I actually used the same stamp, again by Indigo Blu...


To begin with I painted the wooden plaque black, then I stamped the diamond pattern around the edges using Versamark ink, coated it with white embossing powder and heat embossed. I then stamped and embossed the main image in the same way. Once I'd finished stamping and embossing, I chalked all over the plaque and wiped off with the palm of my hand, leaving a chalkboard 'dusty' effect.

To finish I die cut flowers from Spellbinders various elements from Carnation Creations and Die-Lights Blooms Four


That's all for today friends, but later today I will be doing the draw for my 70 follower candy winner, so do drop by tomorrow..it could be you (anywhere in the world!)

Love and Hugs,
Carole  X