Total Pageviews

Showing posts with label hand-made Vintage style cards. Show all posts

Wednesday, 26 November 2014

Nicecrane Two-fer - Wednesday 26th November 2014

Hello Friends,

Thank you so much for all your lovely comments and encouragement...I worked two long days Monday and Tuesday, yesterday helped by one of my office volunteers, Julia and we made a heavy dent in the web updates we have to do..in fact they have now put the big launch date back to January 5th as there have been so many problems...so that's good news!

I brought a bit of work home, but other than that, I'm not back in until next Tuesday, so time to finish off the cards and decorations I've been making.

Glad you liked my Tilda: really these dolls aren't hard to make and I find it very relaxing; I trace the pattern and sew (with Tilda patterns you cut out afterwards, which is much better). I then cut them out and the rest is stuffing and hand sewing, which can be accomplished at leisure in front of the TV. Nice.

Tom's Dad had a lovely 80th Birthday last weekend: as I mentioned, on Sunday we took Tom's Mum, Dad and brother (bro drove..yay!) to Highgrove for lunch. The food was beautiful, the restaurant is gorgeous and decorated for Christmas and everyone had a fabulous time. Now they want to do a garden tour next year, Tom and I have been twice and are due for a Spring visit, so we'll have to arrange it! It is a shame photos aren't allowed, just one of the menu I brought home! :)


Today I am sharing two  design team cards I have made from Nicecrane's Christmas releases. This time I have used the Vintage Christmas Collection 1.

There are so  many gorgeous vintage digital designs over on the website, just click the link at the end of the post to go an have a mooch around the shop!

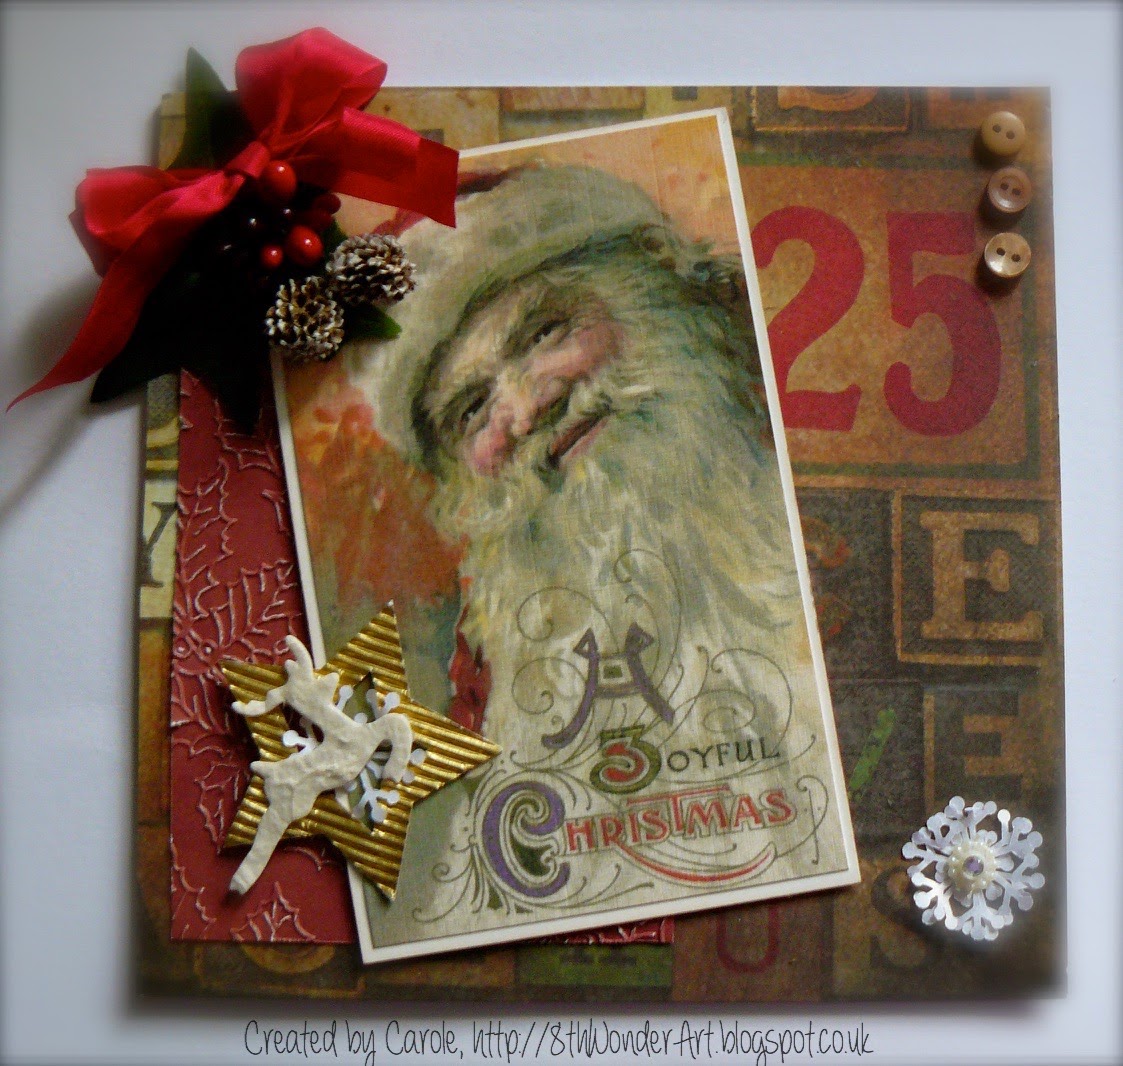
For the first card, I used this gorgeous traditional Santa image, he looks so jolly!
The card is 7x7 backed with paper from Tim Holz. 

I matted and layered the image on cream silk card and also added a layer of red card beneath, which I had embossed with a holly embossing folder.
   
To finish, I added ribbon, holly, cones and buttons and die cut a little snowflake. I also painted over the highlights in the beard and hair with my  clear Twinkle of Stella pen.
For my second card, I used a really sweet image and also made a matching tag:


For the card I used a 6x6 Kraft card blank. The script paper is from my stash and I stitched around the outside, leaving room the curl the card inwards afterwards. I printed the image on a silk card as for the Santa card and dusted with embossing glitter to highlight the snow on the trees and background.

I made a mini wreath from wire, which I covered with twine and then again dusted with snow embossing glitter. I tied red ribbons at intervals and added red paper roses, just for a change from holly! I then added a bow and twine to the side and placed over the image to frame it.

To finish I added some gems and snow glitter to the edges of the card.


I also used kraft card for the tag and covered with the same script card. I curled the edges of the printed image and inked the edges with worn lipstick distress ink, before adding the glitter.
To to finish I matched the bow and flowers and added some red twine.

This is the image sheet showing all the designs in the ranges:


I really enjoyed making these cards and there are many more gorgeous vintage images on the site, just click on the link here:


Just to also add that Nicecrane is the sponsor of the current challenge over at


Thank you so much for stopping by, I have some more images from Nicecrane to work with so will be posting them soon,

Love and Hugs
Carole X

Sunday, 30 March 2014

Happy Mothering Sunday - Sunday 30th March 2014

Good Morning Friends

.... and a very Happy Mother's Day to those of you out there who are Mums! I hope you all have a lovely day.

Today's card is the one I have made for Tom's Mum...


It's made from the box Easel Card template, which I have used before (by House of Zandra). The base box was covered with Vintage Rose paper in washed cream downloaded some time ago from Pink Petticoat (I think the design may have  now been retired) and I made the roses using Spellbinders Blossom Five, which I die cut on cream card and then inked with several different shades of pink and 'honey'colour distress inks. The leaves and Flourishes were made using Spellbinders Foliage Two.

To finish I added a sentiment from Pink Petticoat, lace, beads, buttons and a large bow!

Hope you all have a wonderful day,

Love and Special Hugs,
Carole  X


Wednesday, 5 February 2014

Nicecrane Valentine 2 - Wednesday 5th February

Hello Friends!

Goodness last night was pretty sleepless with all the wind and rain (should be used to it by now!); I hope none of you were affected by more flooding. Thankfully, a sodden lawn aside, we are very very lucky but I do really feel for those who aren't, especially considering so many are all around us in Gloucestershire and Somerset.

Today I would like to  welcome my latest follower, Helen Phillips, who has her own blog: Helen's Corner. You really should pop over and visit for her gorgeous vintage style designs. Thank you Helen for following, I hope you enjoy looking at my cards as much as I do yours!
The link to Helen's blog is http://at-helens.blogspot.co.uk

Today's card is the second of my design team cards this month, for Nicecrane Designs. There are some gorgeous vintage  images available here - both pre-coloured and ready for you to colour yourselves. I have linked the logo picture at the bottom of my post to the shop.

Today's card uses another pre-coloured image, as did yesterday's but whilst that was muted and given extremely vintage 'treatment', this time I have (I think) given it an updated twist.

 The front of the card is a simple mat and layer on black and red to compliment the colours on the image sheet. Whereas yesterday I printed the image on a thin, linen paper, this one is printed on photo paper. All I added to the front is a ribbon and a glittered  3D foam heart from Scrapbook Adhesives.

It is inside this card that I had added a littler surprise! I covered the base of the inside, top and bottom with black card and used printed heart paper from a Pink Petticoat download as the insert.

I cut a  1in x 2in pop out from the centre of the card and adhered two hearts cut with Spellbinders Classic Hearts. The card was some left over card that I had embossed and used on another card.

I do like making little pop up's, but haven't done so for a while, so this was a bit of fun!

Next I used a digitally downloaded sentiment, cut on Labels 17 and matted and layered on red card. I inked the  edges of the hearts and  white label with worn lipstick distress ink and to finish I added red ribbon and a bow.

By the way, I haven't forgotten the blog candi I promised once I got to 70 followers, it was just that last month 'ran away with me' a little....I'm planning the draw for February 14th, just to spread a little love :)

That's all for today folks, stay warm and safe wherever you are!

The link to Nicecrane is 


Love and Hugs,
Carole X

Wednesday, 17 July 2013

Sunday Stampers week - Wednesday 17th July

Good Evening Friends!

I haven't blogged since Saturday and it feels as if I have been away from here ages! The truth is, I decided that a weekend off just enjoying the sunshine would do my neck good and it seems to have worked, as it is much better now. All I've done is some stamping in the garden - I've had this idea to create and art journal of sorts for our holiday road trip and have been stamping images to colour in at times of relaxation!

Thank you for all your good wishes - and Jenny - I got some lavender oil and it's great! Thank you for suggesting it.

How are you all finding the heat? It's great when I'm not in work, although even with all the windows fully open, the craft room is pretty hot and I have been doing what I can out in our little Summer House!

Up until the weekend the hens weren't very bothered, but they are finding it a bit much now I think...we have extra water in their run, where they have plenty of shade and when they are out in the garden there are lots of shady places and we have been putting water everywhere for them...but other than lazing under bushes, they seem to be carrying on much as usual!

Today I am back using the hats and bonnets stamp again, this time a different design and it is also my creation for this week's Sunday Stampers challenge. Hels has set the theme of  creating layers...


I started with a blank A6 card and inked all around the edges with Dusty Concord Distress ink.
For the next layer I used a piece of Damask patterned pink card (the pattern is very pale so can't be seen in the photo). I cut it to about 3mm smaller all around and used a decorative corner punch on the edges.

The image was stamped and then die cut using Spellbinders Labels 17 and whilst I was doing this, I made an extra die-cut to use as a mask.

I placed the mask on the pink card, where I wanted the final image to be and secured it on the back with some low tack tape; then I stamped some script and flourishes around the edge and across the mask, again using Dusty Concord. To complete this layer I inked the edges with the same colour.

The stamped image is coloured using watercolour pencils and I stamped and cut an extra model to layer her on top of the original. Once I had finished colouring I out the shape back in the die and inked with Spun Sugar to give a little contrast. I  then added this to the front of the card in place of the mask.

The flowers were cut using the medium and large Spellbinders Bitty Blossoms and the leaf came from a set of leaf dies. Before adding the finished flowers I placed some lace along the card. To finish I added a bow and a little card candy script button, coloured with distress ink, plus a little pearl in each corner.

Thanks for stopping by, I really so appreciate your visits!

Love and Hugs,
Carole X

Tuesday, 2 July 2013

Lavender and Lace - Tuesday 2nd July

Good Morning Friends,


I love purple and its its relative colours and my favourite plant is lavender, honestly I could have my whole garden filled with it! I love to visit Hidcote and Cotswold Lavender, not too far from us, where you can get quite 'heady' with the abundance of this herb growing in the gardens and fields.

This stamp from Crafty Individuals is the one we will be using in our next workshop, but from the moment I got my hands on it I  knew what I wanted to make  - an easel-drawer card using these colours.

I used my Zandra template to make the basic card with cream linen effect card and I also die cut an extra base and Easel using Spellbinders Grand Labels 23. I inked all the edges with Antique Linen. I also cut two extra layers for the easel, one in patterned paper and the other white card, on which I stamped the image. The image is coloured with Promarkers and Flexmarkers.

The paper I have used is from Graphic 45's 'Secret Garden' collection: I decorated the sides, front and back of the box and also added a lace trim. For the drawer front, I also added a very old belt buckle that was in my button box and that came from my Mum, but I think it may have originally belonged to my Grandmother! Through the centre I tied a lovely vintage ribbon, which I had misted with water and crumpled before drying.


 For the base at the front of the easel, I made a pleated strip with the paper and added three rolled lace flowers to the centre to act as the stopper.


I stamped the tape measure and cotton reel from a set that was free with a magazine and wound some lilac cotton around it; I also added two hat pins. Both the tape measure and reel were made to appear more vintage by inking with Vintage Photo.

I made the roses using Spellbinders Bitty Blossoms and also added two flourishes. All of these were inked using Milled Lavender.

To finish off I added some sewing items to the drawer!


Thanks for stopping by today and
please do leave a comment,
I love to read them!


I would like to enter this card in


Week 213 -Lavender and Lace


Challenge #13: Anything Goes


Stampin' for the Weekend Anything Goes


Love and Hugs,
Carole X

Thursday, 23 May 2013

Sunday Stampers week 258 - Thursday 23rd May

Hello Friends!

Well I did have a pretty productive day yesterday, not only did I make my Sunday Stamper card, but also my Tim's tag and made three commissioned cards. I was so engrossed in my crafting that time just slipped away from me! It was a lovely sunny day and our hens were roaming the garden, or having dust baths, not a peep out of them!

For his week's Sunday Stampers challenge,  Hels Sheridan set the theme of Vintage/old ...and this is my card:


I decided to use the Indigo Blu Elisabeth Bennet stamp again.I stamped it twice, so that I could layer the flowers and butterfly. The card I used is a really soft pale cream. Once I'd stamped it, I took a second piece of card, which I stamped with a script stamp from Creative Expressions Vintage Labels stamp set. I used it  to create a frame over the image, by cutting away the centre, which I then peeled back to create a rough edged  aperture  around the image.I inked the edges of the  aperture, frame and the card using Tattered Rose distress ink.

The flowers, bird and butterfly were the only parts of the image I coloured,except for the lips and I used a mixture of flexmarkers and Promarkers.

Then I got a bit carried away with the embellishments! All the flowers are from Spellbinders Bitty Blossoms, inked at the edges with Tattered Rose again, as are the flourishes (die is from Spellbinders Venetian Motifs). To finish I added some Vintage silk crush ribbon, vintage lace and beads.

Thank you so much for stopping  by my blog!

Love and Hugs,
Carole  X

Saturday, 2 February 2013

All You Need is Love - Saturday 2nd February

Hello Friends,

Today's card is my Design Team card for the new Emergency Crafters Challenge..the theme is Love, but it doesn't have to be Valentine's! I'm writing this at about 7am, but scheduling for later in the hope that the new challenge will be live by then, as we are out all day...not much crafting for me today!

This card was also my group's card for our class on Thursday and the easiest way to describe it's 'construction' is to break it down into sections...sorry about the photo, I hadn't realised it was quite to dark when I originally uploaded it!


The Rose Topper

I Inked the large rose stamp (Kanban) on watercolour card (that was just my choice, it could be any stamping card) using Cranberry Adirondack ink and heat embossed with clear embossing powder.

Next I mixed  a little Victorian Velvet and Bundled Sage  distress(separately) inks with a spritz of water on my mat and using a paintbrush, coloured in the rose and leaves quickly, it just needed a 'wash'.  I then quickly ran my heat tool over the image just to dry off the ink.
Finally I  inked  the edges  of the card with Victorian Velvet before matting and layering on the pink and white card, ddd a little ink to the edges of bottom white layer as well.

The Rose Background for the Easel

For this I used a cuttlebug embossing folder  and embossed it through a cuttlebug, twice to cover the whole layer of the card. In case those of you who have followed me for a while and know how much I love my Grand Calibur are wondering why I was using a Cuttlebug, as some of you know, my GC developed 'internal' problems just before Christmas. I contacted Spellbinders in the US who were brilliant and got the UK repairer to contact me. They will repair for free, but as mine was one of the original machines and is almost 3 years old, I had to pay for the postage to send it to him, with no guarantee he could repair it. After a lot of consideration and communication with the repairer, we decided that in view of the age and possible extent of damage, it isn't worth repairing, so I'm going to have a new one for my birthday. The original is still struggling on, but the more intricate dies are just too much for it. 

A friend of mine who decided to dabble in craft and then decided that it maybe wasn't for her, had bought a Cuttlebug and hardly used it, so she offered it to me just after Christmas for a very small price...as this means I can use the Tim Holz and other thicker dies, how could I refuse that offer!

To make the background paper for the base

I used a piece of linen card cut to the size of the base. Using the Victorian Velvet, I stamped a single small rose stamp from the same set on scrap paper and then inked the card. This way the stamped image wasn't so  defined. I stamp randomly or in a pattern over the sheet, coated with clear embossing powder and heat embossed, then I inked all over lightly with Victorian Velvet.

The Stencilled Greeting

This is a Dreamweaver stencil, used with iridescent Dreamweaver Paste and Dreamwaver F/x mica powder, heat embossed until it bubbled. I actually saw Ali Reeve on TV making her own paste yesterday, something I'll definitely give a go...when I get the time!

To complete I added ribbon and a few gems and left a corner of the topper free from glue, just to turn it up for more of a Vintage effect.

Well for me I am going to have to 'fit in' crafting when I can this weekend as I have a lot of commissions to make, plus a craft fair in March that I haven't even started thinking about...but we aren't going to be home much...it looks like I'll be playing catch up with tonight's episode of 'Borgen' !!!

Hope you all have a fab weekend...please check out the latest Emergency Crafters Challenge here ("m hoping it's live now! If not, it should be in the next day or so)

Thank you so much for stopping by, I love reading your comments!

Hugs,

Carole X