Total Pageviews

Thursday 1 December 2011

December 2011

Hello Bloggers! So here we are in December! I don't know about you, my fellow crafters, but I am still racing to finish my own Christmas cards (having made them for everyone else!) and I still have some general birthday and other occasion cards to complete! But I have now told everyone that I am closed for requests until January...after all a girl has to have time to play and think of designs for next year, doesn't she?


This afternoon I put up some cards for sale in a glass cabinet in Yate Library..last year they sold well, so everything crossed!
I am starting to get comments left...thank you to those who do! I hope my thank you emails get back to you, because it's really good to connect with other crafters and I love reading your comments.


I can't remember if I blogged this (and forgive me for not checking back!), but a few weeks ago, whilst using my beloved Grand Calibur the handle broke in half! Now as regulars will know,  I love this craft room essential.. obviously because I use it daily, but also the ergonomics of it, it's great to touch and use and okay, yes, I love the colour! I never mistreat it(though one of my nicknames is Calamity Jane!) so I was shocked...I 'rescued' it with some industrial black tape and have carried on using it. But when my crafting idol, Sue Wilson was demo-ing Spellbinders recently on Create and Craft and as a daily follower of her blog, it struck me that she might have some idea of the best place to go for a replacement...so I emailed her, and all I can say is 'Thank you so much Sue!' A reply came by return and Sue got a new handle off to me before she headed to the US for Thanksgiving...isn't that great!?!


I expect that most cards posted here for the next few weeks will be Christmas themed, so apologies if I start to bore you! Here is today's card...


Apologies as it's not a great photo and it is a small card (6x6). First of all using my Tim Holz ruler with holes provided (another little tool that gets so much use) I made little faux stitch holes all around the edge of the base card. I cut another piece of white card, slightly smaller  and rounded the edges with a corner hole punch. I like rounded corners so much, this little thing that cost so little is invaluable! I then stamped three fir trees from the Creative Expressions  Snowflakes and Sprigs stamp set using tuxedo black versamark ink and you can't really see in the photo, but I then stamped snowflakes all over with Perfect Medium and embossed these with Cosmic Shimmer Aurora Christmas Sparkle embossing powder. I also added a little of this to the trees.


I used the edger die from the Spellbinders  Holly Accents shapeabilities set. I typed the greeting and cut it out using 2 dies from  the Ironworks Motifs, which is one of my favourites. The star shape can be a snowflake or a star and I think I will be adapting it for cards all year.


Finally I ruched some white American Seambinding ribbon, dampened some more and then dried it with a heat gun before tying it messily and adding a black/white bakers twine bow on top. It's quite a 'busy' card, but I hope it works. I am really liking white on white and monotone cards at the moment.
That's all for now! Carole x


December 21st


Morning Bloggers! We're nearly there now...almost Christmas Day! I finally made my last personal Christmas card on Saturday. It was for my parents in law and I swear I photographed it before giving it to them on Sunday..but it's not on the SD card, so obviously I imagined it! I was especially pleased with it, so when we are over their house next week (they are with us for Christmas so no chance before) I may well take the photo and post it after the big day..I hope you will forgive me for that! 


A few weeks ago I was glued to Create & Craft as Sue Wilson was back with more Spellbinders and more of her absolutely beautiful cards. Work has been extra tough lately and I was thinking that she has my dream job...not only making cards all day long, but also getting to try the latest dies, stamps and other wonderful items that Creative Expressions come up with! Oh well, I can dream!


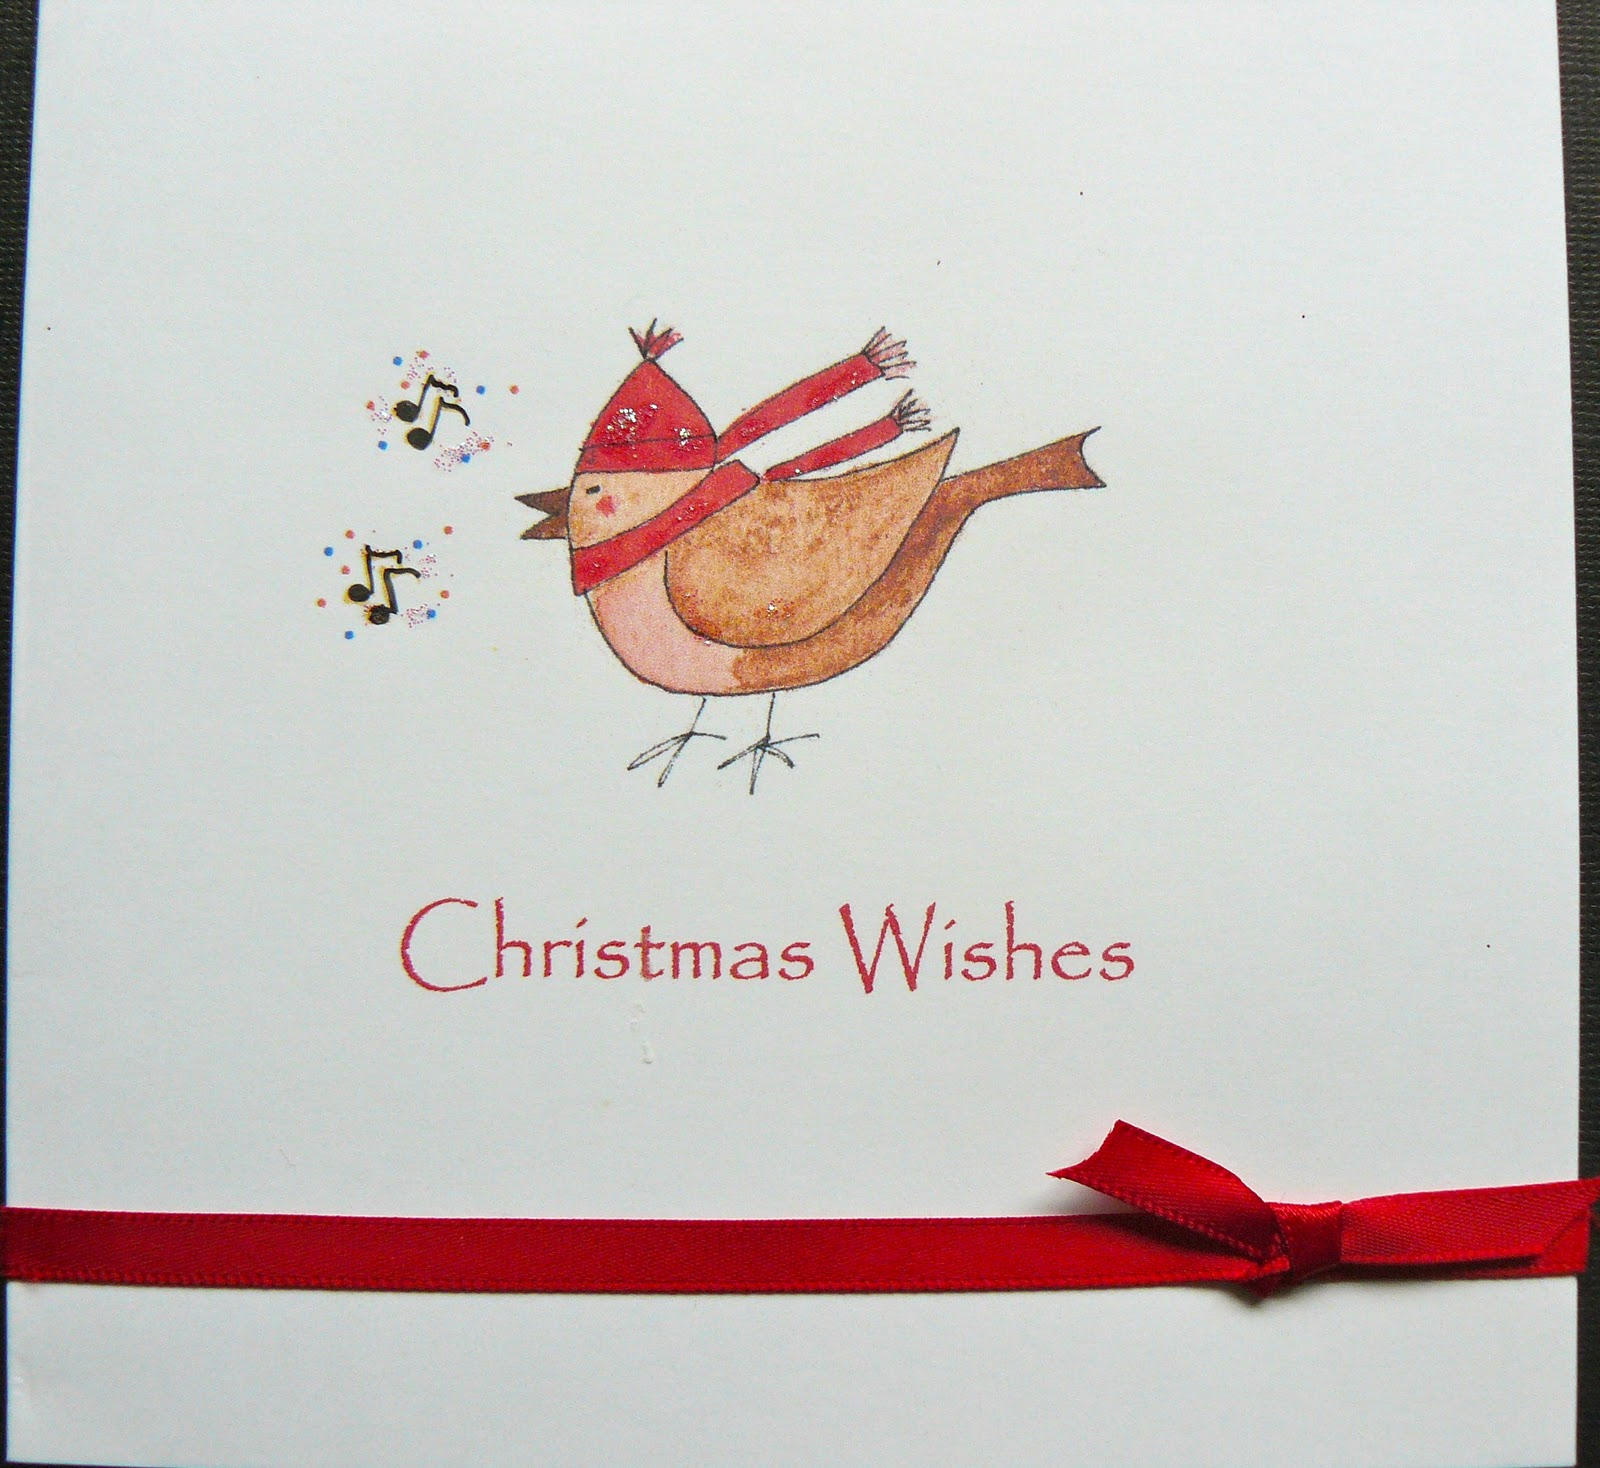
 Meanwhile, here are my last few pre-Christmas cards...

Cute L'il Bear: This card was made using the same Grand dies, but the cute bear is a digistamp, which I coloured (of course) using Promarkers; the edges were coloured with Spun Sugar distress ink...I love this colour. I also cut a die in red and layered the stamped die at a 'jaunty angle' on top of this. The greeting was again typed and cut out on what I think, next to the Spellbinders 'Flights of Fancy' butterfly, is my favourite die..it's from Ironworks Motifs and whilst it looks great at Christmas, I will use it all year round.


I mounted the image on sugar pink glitter card and added red ribbon.


Tree Decorations 1: For this card, I first of all mounted black card on an 8x8 blank. The rest of the card, as is usual for me, I made separately and mounted last. I cut red card slightly smaller than the 
black  and mounted slightly smaller white card on top of this. I then printed green polka dot card from the Polkadoodles Creative Christmas CD (Polkadoodles papers are THE best!) and stamped the tree branches from the Creative Expressions Snowflakes and Sprigs stamp set. I cut a large ornament (Spellbinders Ornaments 2010) on pearlescent card and just slightly shaded the edges with Antique Linen distress ink to buff it up a bit. I then cut and layered two poinsettias, printed the greeting and cut it using  another die from Ironworks Motifs. I was a bit disappointed with the shading, it's probably a bit 'heavy' . I 'drew' the swirls with Cosmic Shimmer Black Pearl and used Cosmic Shimmer Olympic Gold in the centre of the Poinsettias...then of course I added the obligatory ribbon: this time a sheer wide ribbon from stash.
Tree decorations 2: This final card is a variation on the above: this time using two globe ornaments and making the poinsettia from white pearlescent heavy paper and adding double-sided green and red ribbon, which I bought from my favourite ribbon source, Out of the Blue in Chipping Sodbury.


I have calculated that I made a total of 175 cards...about 70 personal and the rest sold at craft fairs, the library and in Tom's office. Next year I am just going to have to make a few a month, because it did get quite stressful during December!


 I hope you like these last few Christmas cards... I will try and get back before the 1st January with the card I promised, but meanwhile thank you to those of you who follow this blog and for the comments you leave, which are very much appreciated. I do respond but am not sure if the messages I send get to you...so I'm not ignoring you, I promise. 


I'll finish wishing you a Very Merry Christmas and hope that 2012 brings health and happiness and lots of crafting to you all. Now that the Christmas madness is over, I will be back more regularly, so please keep watching this space!

Sunday 6 November 2011

November 2011

November 6th 
Wow, I can"t believe it's November already! First of all welcome to new blog followers and thank you for posting comments!
I've had such a busy time trying to fit in card orders and a couple of craft fairs and events with 'the day job' and still it goes on..thankfully I have a backlog of cards to post. Tom (My husband) and I had Friday off to go up to the NEC to the big craft show and had a great time. This year I also got to meet a fair few of my fellow 'Twitter-Arty', Cazz, Jax, Carol, Lynne, Craftmad to name a few and also to chat to some of the C&C presenters and demonstrators...Nigel May, Leonie Pujol, Martyn Parker, Nancy Watt, and many more. I was disappointed that Sue Wilson and Creative Expressions weren't represented at all, but a big mention for Polkadoodles creator and owner...and also C&C demonstrator, Nikky Hall..we tweet and it was great to meet her and get some super stuff from her stand. 

Last year's photo was with Nigel and Leonie (see first blog page) this year I am adding one with Martyn Parker...all good fun! Opposite, Martyn and Leonie crafting demo


And now for a card!


I seem to be on a bit of a 'roll' with mens' cards...considering they are my 'Pet-Make-Hate', but I like it when I can make ones that are simple and a bit 'different'. This is a 6x6 size card, topped with heavyweight embossed matt gold card, which is turn is matted and layered with harlequin card, printed from the Polkadoodles "Wonderland' CD. I then added a layer of black and another layer of harlequin.This was topped with a rectangle of another pattern from same CD. The crowns were cut from my Cricut, Paper Doll Dress Up cartridge and the swirls and tag were spellbinders dies. The card was finished off with a couple of brass brads.
It sounds like a lot went into this card and yes there are a lot of layers, but really it was quite quick to make.


That's all for tonight...I'm going to try and get one up a day between now and Christmas..let's see if I manage it!


November 7th


This evening I am going to an invitation only 10th Birthday Christmas shopping evening at local gift/craft shop 'Out of the Blue' in Chipping Sodbury. I love this shop - not only do Amy and her mum buy in superb quality, trendy, folksy beautiful gift ware, but also the very best and latest  in crafting products - including Tim Holz,Kanban and many more. So if you are reading this, live in this area and have never been inside this shop, where have you been? So, I am looking forward to picking up more craft stash and Christmas presents tonight!
Today's card is one I was asked to make a few weeks ago. As it was a young couple getting engaged I wanted it to be young and quite vibrant. I hope I hit the right note, I am told they loved it!
I printed the greetings on the front of an 8x8 card, after first of all sketching my design. The wording didn't come out of my head, I have, I am sure seen it on a card in a shop!
I cut the larger hearts in various sizes from the George and Basic Shapes Cricut cartridge, the very small ones are from a little punch, as are the butterflies. After attaching them all with small pinflair glue (slightly raised) I used the wonderful Creative Expressions Cosmic Shimmer Pearl PVA to careful add the small pearl drops. I love Cosmic Shimmer, you could never have added so many little adhesive pearls and I think these look so effective!
That's all for now,  Carole x


November 8th


I had a super shopping time at Out of the Blue last night...a glass of bubbly, wonderful cupcake and some Christmas shopping..Heaven! I then joined Tom in the pub opposite where he was reading his book over a pint and had a glass of wine...and all on a Monday night!


I made so many of these animal cards using the Joanna Sheen 'Furry Friends' CD, that it's only right to add some to this blog. I am so glad I photographed them, because most of them sold at the craft fair.
This is one of my favourites...I am really taken with all the Union Jack stuff and so glad it has remained on trend! This 6x6 card was covered in union Jack backing paper printed from the CD and then topped with layers of red, white and blue card (of course!) and finally the good old British Bulldog. I finished it off by tying red, white and blue grosgrain ribbon across the bottom...think it's kind of fun!


November 9th

Today was one of those days! Everything I touched either broke or went wrong! I got all the housework finished yesterday, so I could truly spend my day off catching up with card orders..I still haven't made my own Christmas cards...oh my!


The first card I made, a Christening for a baby boy, was fine..but I had to make 2 for the same person. The second one looked fab, until I realised that I had added the front topper upside down! And so the day continued, until this afternoon disaster struck...the handle on my Calibur broke! Spilt in two...awful, what to do? I found some really tough thick black tape and now, whilst it doesn't look 'pretty'  - it works, which leads me to breathe a deep sigh of relief!


Today's card is back to being 'girlie'.This is an 8x8 card, which I topped with a layer of pale pink card from stash, followed by polka dot paper, printed from one of my Polkadoodles CD's.


I cut and embossed a ribbon circle die (spellbinders teardrop circle set) and threaded it with pink satin ribbon. The pram  was cut from the Cricut Sampler cartridge. I also used a small shapeabilities die in the left corner and attached polkadot ribbon from stash.


A border of lace and an edger cut from a Martha Stewart punch was placed across the card and the greeting was printed on to a labels one, small nestability with a flourish accent die to finish it off. The nestie was distressed around the edges using spun sugar Tim Holz distress ink. 


November 10th
It was a very long day at the office today...one long meeting in fact and quite frankly, Im feeling shattered...so less of the chat and on with the card tonight...


A very simple one...I just love this photo! it is from the Joanna Sheen 'Furry Friends' CD. The card is 8x8. The first layer is black card, to which I added some pale grey check scrapbooking paper from stash. Then a layer of black coredinations, which I distressed, a layer of matt silver, a layer of grey, which I faux stitched in white around the edges, a layer of distressed black again and finally the photo! A lot of layers I know, but in 'real life' it really makes the photo pop. I finished it off with 3 tiny polka dot buttons.
Hope you like it!
Carole x


November 11th


My craft room is in a state of utter disorder...again! Honestly, I waste so much time just tidying it up after a crafting session...but then every crafter I speak to says the same! I discovered today that I can just download a QR reader, unique to me, add it to my cards and people can just scan it and get to this blog! How cool is that? I have Tom to thank for the suggestion...


I'm afraid today's card isn't a terribly good photo. It's a small easel card, again using the Furry Friends CD (Joanna Sheen).


I covered the base card with some  brown paper and some script paper from stash and I matted and layered the photo on the brown paper and some matt gold mirror card. The flowers where made using a punch, layering and attaching with metallic brads.


In keeping with the 'books' theme, I made a little book using the script paper for the cover and glued scrap bits to make the pages. The 'binding' is a piece of gold ribbon and I tied very narrow brown silk ribbon around the 'book; finishing off with a tiny button. I actually photographed this card before tying a greeting to the ribbon.
That's all for tonight, hope you like it! Carole x


November 12th
My craft room doesn't look any better..I tidy my desk in between projects, but the rest is going to have to wait!


As I have been working hard to try and fulfill orders for mostly Christmas cards lately and have yet to upload the photos, I am going to delve into my files of cards made over the past year. This is a bad photo, so apologies. This is a pop up card, so the interesting part is the inside! I don't make too many pop ups, I really like them, but I have to be in the mood as they can be a bit fiddly...this one was really time consuming as there are so many elements and was made for a request. I used  a template from my collection to cut the ship itself and I made the waves and clouds. The ship is attached to slits in the bottom of the card and tabs on the back were stuck to the card with heavy duty double sided tape. I covered the inside of blue cardstock with blue mirror card and the 'Happy Birthday' greeting is a Martha Stewart stamp.


November 13th


I have some of the Crafters Companion Beatrix Potter CDs and when I first had them I made a lot of cards from their content, but need to revisit early next year as I haven't used them for a while. 
  As with most CD's there are a few images, which are used more often, because I like the pictures. I love Jemima Puddleduck and I think this is the best picture on the CD. 
  This is an 8x8 easel card, and I adhered the base image to silver mirror card, just leaving a small border. I then decoupaged the picture. I decided to use the same background paper for the entire card and printed some of the co-ordinating from the cd. A white voile ribbon was tied around the card and the topper placed over it. For the base I added a matching Jemima border and one of the co-ordinating ribbons, in which holes were punched with a crop-o-dile. To finish off, I used a greeting from the CD and added a button from stock as the stopper.


Please hop over to my Christmas page where I have added a few more photos....


November 14th


We are creeping towards Christmas now, so I think the time has come to slip a few Seasonal cards into my daily blog...


You will all recognise the Snowman of course! This is a stamped image, coloured with Promarkers and although the photo doesn't show it well, it is in face a shaker card and a simple one at that..I simply covered the front of a 7x5 card with snowy paper from stash and also covered another piece of card, then cut out the rectangle aperture to make the window. I covered the inside with acetate and stuck it to the front of the card with shaker tape. The 'snow' is inside the window, but I added the snowman and boy to the front of the card, again with 3D tape. I stamped the greeting on to white card and cut out on to a spellbinders label, decorated with ribbon. The card was finished off with some punched out snowflakes with diamantes in the centre.


November 15th


Good evening! Today's card is another Christmas theme, this time a touch of Art Deco! The image is a decoupage printed from Debbi Moore's Glitter & Glitz, Majestic Christmas CD. The jury's out with me on two styles of card, Art Deco and Steam Punk, both of which are extremely popular at the moment, but there are some superb images on the disc and this one is my favourite...the idea of looking out of one New York Skyscraper at the Mother of them all...The beautiful Empire State!It just oozes a luxurious Christmas doesn't it?
I actually chose not to decoupage, except for the stole. I covered the window frames  and the edges of the card with gold peel offs (I rarely use peel offs, but they saved the day here!). The card was cut to the shape of the window to emphasise the style and I simply added some glitter to the 'diamonds' on her dress to make them shimmer. The stole was simply finished off with polar white flower soft. I have a few pots of this product in various colours in my craft room and one of my aims for the new year is to make more use of it.
The card was finished with a greeting tag from stash. A simple card, but it's quite large and I was pleased with it.


November 20th


So much for adding a card every day this month, sorry - it's been one of those weeks: a sick pet hen, lots going on at work, still trying to keep up with card orders and..Sue Wilson has a Spellbinders Pick of the Week on Create and Craft, so when I've been crafting, I've been watching! Well, I have also managed to photograph a few of my latest cards, so here is one for today, hope you like it!


This is definitely a Sue Wilson inspired card! I love monotones in cards, I think they are very elegant and not used nearly enough - of course you may completely disagree! This is an 8x8 card, which I layered alternately in black and white. The black 'pearls' around the outside are simply Cosmic Shimmer dots. I added a ribbon circle die, followed by the 'snowflake' die from the beautiful Ironwork motifs set in black and the very intricate circular die from the same set in white. The corner accents are from the Ironwork Accents set. I finished off with white ruffle edged organza ribbon, black ribbon rose and hatpins, all from Creative Expressions.


That's all for tonight, if you are taking a look for the first time and like what you see, I hope you will follow my blog...and tell your friends!


22nd November 


This evening I am having a crafty evening at my friend Sandra's house, with another crafty friend, Julie...we haven't managed to get together for a while and I'm really looking forward to it...tomorrow there is no work and I will be flat out card making as it's my last full day at home for a few weeks and Christmas is so close!


I hope that I haven't already uploaded this one, if I have then I'll remove it later!
This card was made for a customer and as I was able to choose the design,of course I headed straight for my Grand Calibur and my spellbinders dies. I have ordered and impressability, box and flower die from C&C this week (it's POTW & Sue Wilson has been on, come on I had to order something!) and I am looking forward to playing with them!


This card started life as white on white and I 'beaded' the edge with cosmic shimmer pearl PVA. The edger die and filligree style circle are from the Holly Motifs and Holly Accents sets...and then I added a blaze of colour..deep red poinsettias (layered poinsettia set) with a pearl gem in the centre of each. I don'y yet have any flourishes from spellbinders, so I cut them in green with my Cricut (Storybook). I was really pleased with this card and may well replicate for a display I am doing in the library next week!
Bye for now!

Monday 17 October 2011

October 2011

Hi there! Well we certainly can't complain about the weather for the start of October can we?I have spent the afternoon with my Pro and Fleximarkers in the garden stamping images! I'm preparing for a craft and hobbies day at the library where I am based for work.It's on Wednesday and I have assisted with the planning.The day is all about getting people to take up a new hobby and I will have a card making table, hopefully encouraging people to sit down and make some simple cards. Wish me luck, because I have never done anything like this before and taking workshops is definitely something I would like to do in the future.


Just one card for the moment: this was made for a male who likes waistcoats, roses and is quite theatrical..that was my remit anyway! The waistcoat is a digi-stamp coloured with promarkers and decorated with a tiny paper rose. I embossed red card with roses using my cuttlebug and decorarated the sides with ruched ribbon.


I'll be back later in the week with more cards and a follow up on next Wednesday's event!


Wednesday 5th October 


What a great day! I am happy to report that the hobbies event at the library was hugely successful with a steady flow of people from when the doors opened at 2pm. I really enjoyed helping people, young and old to make cards for the first time, I don't think I have had such a rewarding day in a long time. A couple of people asked if I teach card making and after today, I really would like to..so we'll see..who knows? Whatever the future the whole event was so good..people could find out about scrapbooking, lace making, photography, art, crochet, knitting, sewing, sugarcraft, papermaking and my dear friend Jan came with her wonderful tatting..which was very very popular.


Now I am tired and hungry so that's all for tonight!


15th October 2011


Well it wouldn't be October without Halloween cards..probably because of my American connections, I love Halloween! When friends children were small, we had many a fun filled fancy dress party and went Trick or Treating. The best ever, was the year my American cousin Elisa was over here studying for a semester and helped me put the party together.


I only make a few Halloween cards...mainly to send to America and Italy, where they seem to get  into the spirit of the season a lot more. I do take a few along to the annual October craft fair that I do and have managed to sell a few. Here are this years designs for a bit of spooky fun!
For this card I used a black base, which I layered with some autumnal paper, which had been hiding in my scrapbooking stash for years! The cat was cut from a cricut cartridge and is displayed on two layered spellbinders dies.
I used black base card, layered with purple vellum, which was attached with 4 brads and I finished this with a layer of purple glitter. The tree, bat, fence and pumpkin are all from cricut, cut on coredinations card, which has been slightly distressed to reveal a green core (the black card), though this doesn't show too well in the photo
Not a good photo! I used the same scrapbook paper, spellbinders dies and spideweb cut from cricut on to black and silver mirri-card. There is a tiny spider and bat, both cut from cricut. The ribbon is from stash and the photos don't do it justice! It's very 'rich' in colour, decorated with spiders and webs that feel like velour to touch.
Finally...because honestly I could go on making Halloween cards for..ever! The black 'paws' paper is from stash, the orange oval cut from a grand nestie and the cat and witch's hat cut from cricut. I like the spotted orange bow - I think it really sets him off. 


Hope you like these cards...please leave a note and let me know! I am working flat out at the moment to make cards. I have a craft show on Saturday and had no stock...plus I am trying to finish Christmas cards and orders!


If you live in the Chipping Sodbury area, drop in to Chipping Sodbury Town Hall and say hello, I'll be there trying to sell some cards.The fair is in aid of St Peter's Hospice, a very worthwhile cause.


I'd also like to say thank you to Amy from 'Out of the Blue' gift shop in Chipping Sodbury, for adding a link from their facebook page to this blog. If you are looking for craft supplies, they stock some of the very best  names in crafts and also some beautiful gifts for all occasions...call in and have a look. I actually cannot walk past without popping in and (at least) buying some ribbon!


30th October 2011


After a pre craft show card making frenzy, this week I had to return to the card orders that had landed in my email inbox! The craft fair went really well. I was really impressed by the quality of stall holders and even bought some Christmas presents! I had a really successful day of sales (which was a relief after all my hard work in getting some stock made!) and some lovely comments from people. I would love to do more craft fairs, but apart from not having the time to make stock ( I usually get 2 days a week to concentrate on cards -if I'm lucky), it's hard to get 'invited' if you're a card maker - although, I have to say there are more jewellery makers around at the moment!)


So what were the best sellers? Well...a few months ago I bought software from DoCrafts   to enable me to make 'Me to You' cards. I happen to like Tatty Teddy and he is pretty popular on the high street. The 'gamble' paid off as the cards, especially for Christmas were excellent sellers. Another cd I bought recently, was  Joanna Sheen's 'Furry Friends', a collection of beautifully and quirkily photographed pets - well that went down a storm. People always love cats and dogs! And most pleasing to me, were the number of people who bought my cards made with my spellbinders and snowflake and poinsettia dies...and the lovely comments I had about them. They were harder work to make, but  I enjoyed every moment. They are my kind of card!


I have spent this afternoon cutting and embossing a LOT of these dies for my own Christmas cards. The last few years I have been very last minute, but this year I have resolved that no matter how busy I am, my own cards (and there are a lot to make) will be finished and written by the end of November!


So I have a backlog of cards to upload and here are a few at a time...for Christmas ones, please check my Christmas page....


Yes, it's true the first two cards below are MEN's cards...well no matter how girly I like my cards to be, it had to be done for the craft fair and to be honest, they all sold really well because people are looking for something different for a male friend or family member.


 The above card is 6x6: I covered it with paper from stash and cut the topper shape with my cricut on blue coredinations card, which I sanded to reveal the blue core and then sprayed with Crafters Companion, spray and sparkle (multi-colour). The vespa is a rubber stamp, which I coloured with promarkers.
 This is another 6x6: I covered the front with light blue coredinations paper, which was sanded. The trees were cut with my cricut and the man in the hammock is a rubber stamp, coloured with promarkers. Both of these were quick, simple cards to make.They aren't really my style and are more made out of a need than a desire!
 This one could be for a male or female and I had such fun making it - a very autumnal card for any occasion. The size is 8x8 and was covered with some maple leaved paper from stash. I printed the photo from the Furry Friends cd and then used the leaves mat, putting the photo through the Grand Calibur, just over one corner. I also did the same to some bronze metallic card and cut out the leaves. The photo was then matted and layered and placed at an angle over the leaves.I finished the card off by tying some absolutely autumnal beautiful ribbon around the card. I think this has to be one of my favourites.
I photographed the above 8x8 card before adding the greeting - so that's why it has the 'unfinished' look! The card itself was covered with some paper from stash that had a pale 'newsprint' background. The photo was from 'Furry Friends' and I matted and layered in on silver metallic card (even though it looks red in the photo!) and then some monotone checked, quite masculine paper. The edging at the side of the card is a spellbinder die (Parisien set) and I added some small pearls. I tied a black and white check ribbon around the matted and layered photo and aded a few buttons. The card was set at an angle and my finishing touch was a flower made from newspaper using the anemone spellbinders die. This is a 'masculine' card, but I think it still has the feminine touch that I like!


That's all for today...I'll be back with a few more and a new November page in a few days...meanwhile, "Happy Halloween!"

Thursday 8 September 2011

September


Hello there! No cards to post today, but I am hoping to get some on here tomorrow. I have made some, just need to upload. I have been so busy at work lately, as well as with requests for cards...it's funny that just as all you want to do is stay in 'Christmas card' mode, you get an unusual number of orders for birthdays and babies! On top of everything I have to organise some stock for craft fairs starting in October and make up some card making kits for a workshop type event at the library. I wish work wasn't so busy at the moment as well and then of course there's Italy soon...OMG!


I just have to keep telling myself that it will all turn out alright in the end! On a brighter note, the Spellbinders POTW on Create and Craft was fantastic, except of course it barely lasted a few days! I got in early and ordered some, together with Sue Wilson's DVD. I wanted the lot of course, but that was never going to happen...as it is the ones I have are my Christmas present and Tom will be given the packets to wrap up because I need them...now!


The Dies and DVD arrived this morning and I can't wait to use them and also to watch Sue's DVD...oh for more hours in the day! Tomorrow would normally be a card making day but my friend Steph and I are meeting in Bristol to go to the Royal Western Academy to see the Tracey Emin exhibition. I have just seen her 'Love is all you want' exhibition at the Hayward Gallery in London and was very impressed, so I am well excited!


The Tracey Emin exhibition was great - both Steph and I really enjoyed it and I also really enjoyed the Crafts for All show in Bristol on Saturday - super to meet one of my Twitter buddies, Lucy and also great to see one of my favourite craft designers/create and craft demonstrators, Debbi Moore there. It would be so nice for us to have a big craft event down South! Oh and Sue Wilson's DVD - fabulous!!!


The past week has been manic at work, I had a disaster with an SD card and we are going to Italy tomorrow- so just a couple of cards to be going on with for the moment....


The above 8x8 new baby card was first of all embossed with a cute floral Creative Expressions Mask, which was chalked in pale blue. I then added a scalloped Spellbinders Die, threaded with blue gingham. The bear is a digi-stamp from Polkadoodles 'Sundae of Seasons' cd, which I again coloured with fleximarkers. A few buttons were added and the greeting printed on to card,along with a smaller image of the bear. The card was then die cut and embossed using a Spellbinders die and tied to the corner of the card.


The above card was made for someone going on maternity leave (it was known she was expecting a girl). The image is a digi-stamp from 'Pink Petticoat', coloured with a mix of both flexi and promarkers. The card was cut using a scalloped Spellbinders oval and the edges were coloured wit spun sugar distress ink. The butterfly is a Spellbinders Die (flights of fancy) and the flowers were cut using the Cricut. A fun card to make!


That's all for now...more here and more on my Christmas page after the holiday...we're just about to leave for Italy!

Wednesday 10 August 2011

Christmas Designs Preview 2011

I have decided to create a separate blog post for Christmas cards...hope you like them! 
Some, made with Spellbinders Dies or House Mouse stamps, were also featured on my July blog...so if you wish to see how they were made, please refer back. These are just a few of the designs, there are others in July!!!
 I have now given them titles for easy reference:
White Christmas


The Holly & The Snowflake! 


Eaten too much! 

Merry Berry Mouse
close up from above card
Golden Globes
Windy Winter Day: This card in reality is large (A4), but it could be made to any size. The girl is an image from Polkadoodles Paper Boutique, Creative Christmas CD and I covered each part of her clothing with felt. It's a really 'touchy-feely' card. She is set on a white glitter background and finished off with polkadot ribbon. A fun card, especially for a little girl.

More to follow later....soon

October 30th 2011

For my main blog today, please see the October page, but here are a few more Christmas cards..

The first one was made by first of all embossing the front of the card, using a snowflake die and using my Cuttlebug, using the debossed side. I made 2 poinsettias using Spellbinders dies and the Grand Calibur (I love these dies) and finished it off with a greeting and some deep red sheer ribbon.


 I have made quite a few Christmas cards using the Me to You cd... I printed this one and they cut it out with the Picot Edge Circle Spellbinders die, which is ideal for feeding ribbon through! The card was backed with paper from the cd.


This one is a bit of fun for a dog lover! I covered the 8x8 card with red card from stash; matted and layered the photo (from Joanna Sheen's Furry Friends cd) on silver metallic card, leaving just a narrow edge and finished it off with a swirly shapeabilities die, from the 'Fancilful Holidays' set and the 2010 Spellbinders ornaments set. I added a plain satin ribbon, polka dot ribbon and a button...cute!
That's all for now folks x


November 13th 

I have been so busy making Christmas cards for orders, that I haven't even started my own yet..which is very worrying! But I wanted to share a few cards with you from my library, and these are cards are made using my own art, which because I am so busy making the cards, I don't get much chance to do lately.. 


 I am not good at drawing from imagination - I need a photo or some other inspiration and I think this was a Christmas ornament that I sketched. I did this is the days before using Promarkers was the preferred colouring medium, so I used watercolours.


This was sketched from a  Primitive folk art picture (I love Prim art) and again watercoloured. I did several paintings similar to this one.


Finally, this is a photo I took at Batsford Arboretum in the Cotswolds, on a spring day a few years ago. He was a very willing little fellow and I took quite a few photos, so decided to put them on my Christmas cards that year... I think next year may be time to bring him out again.


I haven't explained how I made these cards as they are all 6x6 and very simple makes...even made before I got my Calibur and Cricut!


Monday 8 August 2011

August 2011

Hi all, I have been busy these last few weeks trying to get some cards made for my cousin to try and sell at her fundraiser for Cancer Research in a few weeks and it's also been a busy time with family birthdays...and I'm also still determined to get my Christmas cards made!
 I am quite excited to read on her blog that my  'crafting idol' Sue Wilson is soon to bring out her first crafting DVD...oh wow! 


You know how much of a Promarker fan I am? Well Nikky Hall and Martyn Parker simply talked me into trying Letraset's new FlexMarkers on Create and Craft last week...can't wait for them to arrive and share with you my thoughts on them!


Here are a few of my cards to share with you so far...


The first one is my 'grunge bag'! I cut the shape for the bag using my Cricut Storybook cartridge, first on plain white card and then on Tim Holz/coredinations card (antique linen), I sanded it and then stamped the birds. I used brown polka dot paper from stash to cover the bottom of the bag. The 'thank you' was stamped on to a die from the Spellbinders Parisien accents set and the flowers were made from the anemone spellbinders die and flowers/leaves from cricut cartridges. They were curled, sanded and I added a hint of glitter. The card is finished off with a rusty wire handle. This card took a while but it was a joy to make!


This was a simple card made from acetate. I have to confess the paper was from my stash, but it was printed from one of my CDs...I will revisit when and add which one when I have found it!
The flowers and tags were made using punches and the card was finished off with a brad and some ribbon.


I am very fond of Tatty Button and how different colourways work so well. This was made using a deep fucshia coredinations card. I used a Martha Stewart punch for the border and threaded matching silk ribbon through. Tatty was coloured with Promarkers (of course) and the flower was again made by stamping, colouring and cutting out several umberellas from Tatty's 'worker' stamp set.


A new House Mouse stamp to play with! They are just irresistible! Need I say he was coloured with Promarkers, after being stamped in to a deckled oval spellbinders die? The edges were accented with tea rose distress ink.I used a hole punch to make the circle for the easel card to rest on and decorated with polka dot ribbon and buttons from stash. 


This is Tatty Button's little mouse pal, Pip. Again stamped on a deckled oval die, which is inked very subtley at the edges with Spun Sugar distrss ink. I used paper from stash and polka dot ribbon in translucent brown finish it off, together with punched flowers and brads


One last card for now...my first from the Tatty Teddy, Me to You CD I just bought. I decided to buy this one for two reasons...I do like this little bear and I hope he will sell well at fairs, but its the first CD that has been made available that works properly on a MAC!!! You can access the files on most of the others, but I usually revert to my laptop for interaction...this one interacts all the way on my Mac..wonderful! This is one of the digistamp images, which I coloured...the image was printed on to Nenah white card and cut with the deckled oval die...just a simple, fun ca


Friday 26th August
More cards will be added in September; we've been on holiday - a 'staycation' which was absolutely fabulous.. London, Alfie Boe in Les Mis, Tracey Emin exhibition, followed by a host of other arty type trips closer to home: Oxford and the Ashmolean, Bath and the Holbourne (Peter Blake's Museum for Me exhibition was superb) and just exploring our Cotswold countryside. It's sometimes nice just to spend time in the beautiful surroundings on your 'doorstep' so to speak.


I have already started to think about some scrapbook pages from the holiday and will post them eventually! I came home to a lot of orders for cards, so that has put a temporary halt to my Christmas cards, just as I was getting into the swing of it. We have a holiday again in a few weeks, this time off to Italy, so I had better get moving!


It's going to be a card making day today as no work, but I am very excited about the POTW on Create and Craft, because it's Spellbinders! My Christmas present sorted! I am also excited about receiving Sue Wilson's DVD...can't wait!