Total Pageviews

Sunday 30 September 2012

Batty about bats!- Sunday 30th September

Good Morning my crafty Friends!

I hope you all had a super Saturday and the sun shone on you! It was gorgeous here - we did so much yesterday, in fact everything except crafting!

We live right on the edge of the beautiful Cotswolds and between two towns: one of them is Yate, to anyone who visits, a 'new town' which sprung to life in the 60's, so a mix of that architecture (including the shopping centre) and newer houses built in the 90's (like ours), plus of course in this day and age ever expanding. I like where we live, we have a large garden, lovely woodland walk on our doorstep and farm land a five minute walk away, but sadly it seems, houses will soon be built there too. However, Yate does have a plethora of history dating back to the Iron Age, a lovely little heritage museum and a tudor house on the outskirts, where Henry VIII once made a stop over!

The other town (which I confess I prefer and spend most of our local shopping time) is Chipping Sodbury. Younger than Yate, but looking much older - very medieval, your typical Cotswold town. All this  history lesson, just to tell you about yesterday! 

Chipping Sodbury Food Festival and Jazz Festival(including local Somerset Jazz legend Acker Blk), plus a Vintage Fair, were all being held - so our little town was packed from very early. We got into the car park just after 9am and had virtually the last space! Having bought the papers, we went to our favourite deli/cafe..full with visitors having breakfast! No worries as, with most Cotswold towns, with just one high street, there are several cafes! A leisurely cappuchino and then we dropped off at the Sodbury in Bloom stand to say hello to one of my office volunteers, who also volunteers with the 'in Bloom' group, which this year won a Gold Award! Then it was to my friend Amy's shop,Out of the Blue, and I'm not saying this because she's a friend, but she and her mum do have the very best shop in town. The gifts for sale are such lovely quality, trendy and tasteful and she picks all the best craft items, so needless to say I called into say hello and spent money! After that, we fought our way through the packed Vintage Fair,  walked over to the farmers market and then back home. The missing bits for the coop had  finally arrived, so we put them in place and finally got round to dismantling the old nursery coop as the new girls and the old girls are all happy now!

Last night was the bat walk with the RSPB: I love birds and wildlife and have been a member for several years, their events are always friendly and informative. We are also members of Westonbirt Arboretum, just a short drive from our house and very beautiful, and that is where the walk was being held. About 15 of us turned up, we had a very interesting introduction to bats from Mark of the RSPB, got issued with bat detectors and then set out into the woods..stopping off at the wild bird hide. Honestly, we always spend time here when visiting and it is always so 'busy' with anything from woodpeckers to blue tits...yesterday afternoon...zilch..unless you count a family of about 6 squirrels! Next up Mark told us a bit about some funghi along the way and we stopped off at the pond, where he and Amy (also from the RSPB), tried to catch a newt (sadly they weren't playing either). By now the moon was bright and beautiful as dusk drew in, the owls were twit-twooing to one another and and how the bat detectors hissed with static! It sounded like we were radioactive. Suddenly they also started to pick up the sound made by Pippistrelles, we all stopped but they weren't going to be seen!

Mark and Amy had spotted lots of bats behind the Education Centre, in some woodland close to the buildings that picked up a security light, so we headed there: certainly there was a feast of moths for them, we did pick up sounds from a few species, but none came on show...of course this all goes to show that you just can't predict wildlife!It doesn't matter...we all still had a great time. It was a lovely, clear night, stars in abundance, but may have been a tad too cold for the bats. After an hour or so, we all headed inside for a well needed coffee and natter. 

All Summer we get a few Pippistrelles flying around our garden in their figures of eight most dry evenings, so I had more chance of seeing them at home, but it was a super evening, very eerie in the forest, we learned quite a bit and the company of total strangers was lovely..even though two little boys, from two separate families, aged 4 and about 12, did at times make me think we were extras on the set of Outnumbered! Tom actually thought that combined with the creepiness of the forest and sounds of the wildlife, it could have been "Outnumbered does Jurassic Park", now there's a thought Mr Spielberg. I'm not being mean, those boys actually lovely, obviously highly intelligent, not a bit shy and just like those kids on TV!

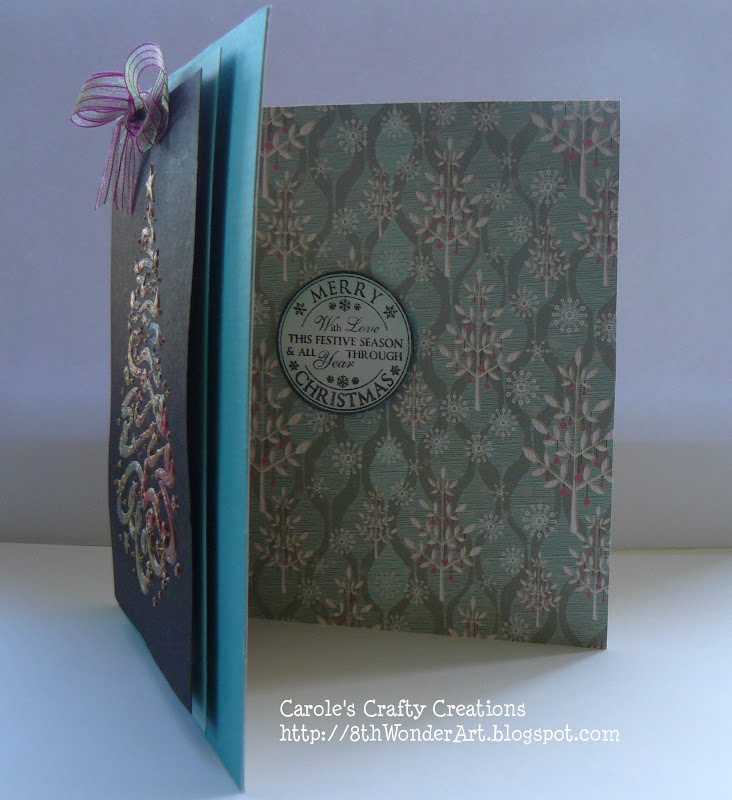
So here is my card for today, the simplest of all Halloween cards, featuring a bat and made almost entirely using my Cricut....Sorry it's been such a long post..hope I didn't bore you all too much!


Thanks for stopping by, hope you have a great Sunday all, I'm hoping to get crafting at some point!
Carole X

Friday 28 September 2012

House Mouse Autumn Leaves - Saturday 29th September

Good Morning Friends!

I hope you have all got lovely weekends in store and the weather holds out for you! Tom and I are hoping it stays dry because we are going on a bat walk tonight with the RSPB at Westonbirt Arboretum...I will let you know how it all goes tomorrow!


Today's card is my DT card for the new Emergency Crafter's Challenge, which has the theme of autumn leaves. I've chosen this cute House Mouse stamp for my design, which I am also going to enter into the current House Mouse Monday Challenge which has the theme of autumn and/or Harvest.


I started off by inking through a 'That Special Touch'  leaf mask with a combination of  Wild Honey and Rusty Hinge distress inks (I love this combo!). I stamped the image and coloured it with Promarkers before cutting out and mounting it on a die cut circle, which had been coloured with the above inks, plus Victorian Velvet.

To finish off I die cut some leaves in felt from the Spellbinders Fall Foliage set, added some ribbon and a leaf brad from my stash.

Why  not pop over to Emergency Crafters and join in with our challenge...there's a super craft kit to be won!

I wish to enter this card in the House Mouse Challenge reference HMFMC129 

Thanks for stopping by! Happy crafting all :)

Carole X

Craft class pics - Friday 28th September

Good Morning blog friends,

First of all, thank you for your comments yesterday - as always I really appreciate them! I'm sorry I didn't get around all your blogs yesterday, but by the time I got home from work it, it was almost time to go out to our class again! I will take some time later today to have a cuppa and a proper read of them all.

Class last night went really well, I thought  it would quite a hard card to tackle for anyone new to crafting or the technique and we did have a few ladies last night who were fairly new..but everyone did such fabulous work and despite some initial problems with the stamp not stamping the whole image (mainly due to the tables not perhaps being as 'weighty' as we would use at home), perseverance and determination worked and the cards were all brilliant...so well done all of you!


Unfortunately some had left before I got my camera out again to take the finished cards last night and I also have to apologise for the quality of the photos, but I don't know if I had a reaction to the embossing powder (oh goodness no!) or some just got in my eyes, but they suddenly felt very sore and I started feeling sniffy...fine now, but it did have an affect on my photography!


 Thanks again to Amy and all our ladies who come along to craft, have some fun and hopefully learn some new techniques and get ideas from each other!

Happy crafting everyone!
Carole X

Thursday 27 September 2012

Wheat Field - Thursday 27th September

Morning Blog Friends,

Tonight is our latest workshop, only two weeks since the last one and I've been on holiday, so preparation time was limited. I was also panicking because yesterday, my day off, I was supposed to be going to a work meeting, which was only going to leave me  a few hours to get my head around probably the most 'complex' card we have made so far...complex more in the way of a lot being involved, that more difficult.

However, at the last moment on Tuesday I heard that I wouldn't be going, I can't tell you how relieved I was, having to do work things on a day I devote to crafting and my commissions, especially straight after a holiday, is not good!

This is  my demo card for the card we will be making tonight and is based on a card we made (though never finished) and the Woodware workshops a few weeks ago, using a Woodware stamp (Wheat). Don't look too closely, because I hate measuring, much prefering 'by eye', but this card really needs measuring and I had such a short time to make it, so the panels may be a bit wonky!


Now  to explain how it's made!

Materials:

Card blank
Blue card
linen finish card
Stamp
embossing ink and clear embossing powder
chalk inks
kitchen towel or paper dusting cloth, heat tool and iron
mdf square
ribbon, bakers twine, gems

First of all (and I'm sorry it doesn't show in photo well), I took an A4 sheet of the linen card and stamped the barley image three times across the top half (overlapping) and twice along the bottom edge and then I also stamped the sentiment - all with embossing ink.

Next I covered all the inked images with clear embossing powder and set with a heat tool. Next I rubbed blue inks over the whole area in circular motions. When I was happy that I had covered everything, I rubbed hard across the card and the embossed images with a paper dusting cloth, this gets rid of the excess and raises the image revealing the resist. Finally, I iron the card between two sheets of copy paper to set. 

The remainder of the card is simply cutting to size and matting and layering, it's a nice textured card and nice and messy to make, which suits me, though my style is more grungey and steampunky really, I am sure the class is going to love making it!

Thanks for stopping by!

Carole X


Wednesday 26 September 2012

Be Afraid! - Sunday Stampers 224 - Weds 26th Sept

Good afternoon blog friends!

Thank you for your comments on my door wreath yesterday, I do appreciate them all. Wreaths are certainly a cheery welcome to callers and a good conversation point, I always get a lot of comments..never have been able to start a trend though, it's only at Christmas that everyone else seems to join in!

I'm later posting today, after two weeks off with little crafting time, it was my first chance for a whole day of crafting (housework? What housework?) and to prepare for our next workshop tomorrow. This time it's been a real rush for me, as it's only been two weeks since our last one. Do check back tomorrow for a glimpse of the style of card we will be making.

Today however it's Sunday Stampers time again...it was really lovely to say hello to Hels Sheridan on Saturday and see all her lovely makes, and they really were fabulous. The challenge this week is all about using masks or stencils and here is my contribution ...and my first Halloween card for this year! I love the colours of autumn and Halloween cards...so be prepared for more to come!

This is a 6x6 card blank: I cut some card  for the front as I knew that direct to card I'd mess up, plus it gives it weight . I used a lattice 'That Special Touch of' mask and sprayed through it with Tarnished Gold and Marigold Cosmic Shimmer sprays, then dried it off with a heat tool.

I then removed the Mask and built up inking all over the card using Wild Honey, Vintage Photo and Rusty Hinge distress inks, which I also dried off with my heat tool.  Next, I stamped the haunted house and spider webs direct on to the card and the cat, owls and sentiment on a separate piece of card. Now I will 'confess' - the sentiment is covering a mistake! I originally intended to stamp the words direct on to the card, which I did, but upside down!!! So I had some scrap pieces from the front and stamped on that, to make a scroll and cover it up :)

The stamped house was covered with Promarkers, Pumpkin(how apt), apricot and orange for the roof and Lime Twist, Meadow Green and Buttercup for the rest. I then cut it out and layered it over the original stamped image.

The stamps are all from Chocolate Baroque
 I decided to follow through on both the inside and back as I was having so much fun....


Thanks for stopping by, I really do appreciate it...crafty hugs to you X
Carole X

Tuesday 25 September 2012

Autumn Welcome - Tuesday 25th September


Good morning blog friends!

I'm glad you liked the Ally Pally photos yesterday, thanks for stopping by and leaving your comments.

Today's post is Anna autumnal offering which is currently hanging on our front door and will do so until Christmas, with maybe a slight alteration over Halloween. For my newer followers, a little recap of previous door wreaths from this year....


St Valentines
Spring/Summer


I've had door wreaths for many years, having admired them on doors of the homes of US family and friends. I think the autumn colours are my favourites, rich browns, yellows and oranges, so I really enjoyed putting this one together a few weeks ago.


I stared with a plain grapevine wreath - we have a massive grapevine in our garden and this year I had visions of drying my own, but the weather has been so poor over the summer that the grapes haven't even turned red! The hens have also taken a liking to th leaves and stripped a lot of the lower branches. But if the weather changes again at the weekend and I get the chance I will try and harvest some for a wreath next year. Anyway, this one was purchased quite cheaply from Calico Crafts, along with the gorgeous orange foliage garland. I wound the garland around the wreath and then added some felt leaves which I had cut using Spellbinders dies. At the bottom I also added leaves cut from craft foil.


To finish off, I added a big  checked bow using ribbon from a great big reel of parcel ribbon I bought at Costco and two little pumpkin buttons from my button box!

Hope you like it and thanks for stopping by!


Carole X


Monday 24 September 2012

I'm back! - Monday 24th September

Hello Blog Friends and how are you all!

Thank you for leaving your comments on the posts thatI managed to schedule the last two weeks whilst we were on holiday...all too soon the happy holidays are over aren't they? We had a lovely two weeks though; the weather was very kind to us, we visited lots of places, some old 'haunts' and one or two that are so close to us and which we'd never been to before!

I have taken lots of photos, so expect some scrapbook pages over the coming weeks!!!

Since Thursday we have been in London, travelling back yesterday by train in all that horrid weather - and to think that on Saturday we had a picnic outside Ally Pally and I was wearing a tee shirt!

London was, as usual fab, I always love our visits. I've been lucky enough to have visited some amazing cities in this world, but London is always my favourite. We went to the new Westfield Mall and managed a peek at the Olympic Stadium, we walked along the Regents Canal from Cambden to Little Venice and then Paddington (how peaceful that was), finally got to an opera at the Coliseum (Magic Flute) and also saw a totally bonkers mad but highly enjoyable comedy version of The 39 Steps, with just four energetic actors taking several parts... and spent a lovely morning at Ally Pally before a visit to the National Gallery and some final shopping..phew!

Ally Pally was great: in a larger hall this time with more space for both visitors and exhibitors. We got there first thing. It was such a lovely day that we wanted to get back to London and enjoy an afternoon there before the theatre. I have been to the NEC shows several times and this was my second Ally Pally - there are several reasons why I prefer it - it's smaller and specialising in stamping and scrapping, which I love! Most of the big shows seem to be in the north or the midlands, we don't get much down south, so it's so nice to have one in London and be able to make a weekend of it.

Barbara Gray

Sue Wilson

Sam Poole

Some of Sam Poole's fab work

Some of Hels Sheridan's brilliant pieces

Hels Sheridan

Leonie Pujol giggling as usual!


Ali Reeve


Ally Pally, Great Hall


Getting there early was great as there weren't many people: the first person I saw was Ali Reeve and I actually had quite a long chat with her about, not only crafting, but comparing notes about our hens! I also managed a brief chat with Sam Poole and Hels Sheridan, who both had the most amazing art work on display, it was really nice to see all their creations. I tried a few times but couldn't get near Sue Wilson and the 'worrying' thing was that whenever  I went back, some of the same ladies were there around her table( and we are talking quite a bit of time in between!). We went to Ali's super demo and had a quick look in on Julia Watts, but I had to miss Hels and Sam as they were in the afternoon. Leonie Pujol was in a similar 'position' to Sue Wilson, lots of people round her table.

So what did I buy with my stash money? Well, I got a few more masks from Ali Reeve, plus I thought I'd try a pack of her washables. I got some mdf pieces to alter - a book, a box and two little suitcases - these were so inexpensive, it was rude not to! Some stamps from LOTV...stamps, hmmm I could of course, have spent  a fortune. I also got some dies..the cogs and sprockets and the bracket edge box, which Creative Expressions were selling for a very good price. There were things on my list like some more pan pastels and dylusions, that I didn't get, but I did very well and the dies are my Christmas present!

I'll try and catch up with all your lovely blogs later tonight, after tea on the sofa with my iPad :)  Do check back here tomorrow - those of you who have been following me for a while, will know that I have some American family connections and one little decor thing I picked up from my time there is the door wreath tradition: a welcome wreath for your front door, which changes with the seasons. This year to celebrate my blog, I decided to make new ones and Autumn is here so I have just decorated our front door with my autumnal creation, which will be here tomorrow!

Thanks for stopping by!
Carole X

Thursday 20 September 2012

Dreamweavers Christmas Tree - Thursday 20th September


Good Morning Blog friends,

Today's post is scheduled as we are off to London today for the last few days of our holiday; our hens are having a holiday of their own back at the farm where they came from, so all is well! We are going to the Ally Pally Stamping and Scrapbooking Show on Saturday, so hopefully I'll have lots to 'report' next week.

As we've been on holiday the past week or so, I don't have any other projects or cards to post, so I'll be missing from here until next week, but I'll be visiting you all when I can.


This is one of the cards we made during the Woodware workshops last week. To create this design we used the Dreamweaver Christmas Tree Stencil with Dreamweaver Pearlescent Embossing Paste and metallic powders.

The stencil is attached to the black card with removable tape and then a palette knife is used to smooth the paste over the stencil openings. Once you've done this, you need to carefully remove the stencil before sprinkling the  powders over the paste. There are different methods that can be used to create cards with these materials, the one we used was 'molten magic' where the paste- embossed image, covered with the mica powder (excess shaken off) is heated with a heat tool, which forms large bubbles as it is heated.


I think this was my favourite technique of the day and I am anxious to try it at home. I finished the card off at home, but felt the finished image needed a simple background. The photo doesn't really do the finished tree justice, especially as it is also a very 'tactile' image as well as bright and cheery.

Thanks for stopping by here, I will be back next week...we have another workshop and our next card will be from another technique we used at the Woodware Workshop, so I will be sharing that with you,

Happy Crafting everyone!

Carole X

Wednesday 19 September 2012

Happy Anniversary - Thursday 19th September

Hello again Blog Friends,

A quick second post to show you the anniversary card I made for Tom on our anniversary today...he is a bit of a romantic (the Italian blood!), but I never go overboard on the romanticism in my anniversary cards, I like to also reflect the humour we share, so when I saw this stamp, I just had to buy it!


I used a pre-cut large card, which I embossed with an M-Bossability and then coloured with Victorian Velvet distress ink. The stamp is by Stampendous, coloured with Promarkers, die cut using Spellbinders Classic Rectangles and mounted on polka dot coredinations card to which I added a hint of cosmic twinkles. I used the little heart and ribbon from stash (well I saw the ribbon out and about last week and had to buy it!) and I typed the sentiment. You can probably guess it's translation from Italian, but if nor, it says 'Love Conquers All'

We have spent our anniversaries in some wonderful places over the years...from a soggy but lovely honeymoon in the Lake District to the pyramids in Egypt, visiting my family in California, his family in Venice, various places in our own beautiful Country and this year, on holiday at home, where we have a lovely day planned (I scheduled this as we left early!).

We will be dropping our hens off at the farm for their little holiday, then driving about half an hour to a lovely National Trust property called Newark Park for a nice long walk. After that to a gorgeous country pub for a late lunch...and the sunny is shining on us too as I write this at about 8am!

Hope you all are having a super day, thanks for calling back,
Carole Z 

Sunday Stampers Week 223 - Ribbons!

Good morning lovely blogger friends!

Thank you so much for dropping by and looking at my creations - and especially for leaving a comment, I do read and appreciate them all and I also love to visit your blogs too, I think we learn so much from each other, don't we?

My DT project is now up on the Fantastic Ribbons site (Kirsty had left the 'e' off my name, but I'll let her off this month!), so please hop over there and leave a comment and take a look at the other lovely DT projects as well, washi tape is really fun to use and very effective. I don't know if any of you are already following or know of Kirsty Wiseman, but take a look at her blog. She is one of the most amazingly inspirational bloggers I have come across, as well as being a brilliant crafter and fantastic photographer.

Anyway, another crafter and artist who is a continuous inspiration to me is Hels Sheridan. I am so pleased we are seeing more of her on Create and Craft because she creates absolutely brilliant projects ( and I was lucky enough to win a card!).I love trying different  ways with stamping and the kind of art and craft that Hels creates is just my cup of tea, so to speak!

So, despite being on our hols, I didn't want to miss a Sunday Stamper ....but being as I am not getting much done in the way of crafting at the moment, I have created another simple tag as my project for this week.

It's simply a parcel tag, covered with some mottled dark purple paper and inked at the edges with Aged Mahogany distress ink. Using the same paper, I stamped one of the bodices from Creative Expressions Vintage Lingerie set, using Perfect Medium and then heat embossed it in black. I then punched holes where the ties would be and used some irredescent purple wired ribbon to tie it in a criss-cross. To finish off I added the same ribbon, plus some lush velvet pearled ribbon across the bottom and for the tie.


I may have another post later today, it's our wedding anniversary, so if I get time I'll post the card I made for Tom - it's a bit of fun! There will be a scheduled post tomorrow and then we are off to London, with a day at the stamping and scrapbooking show at Ally Pally on Saturday..Yay!!!

Happy Crafting Friends!

Carole Z X

Monday 17 September 2012

Fantastic Ribbons DT Washi Tape Boxes - Monday 17th September

Washi Tape Month at Fantastic Ribbons!


I was thrilled when I was recently asked to become one of the new members of Fantastic Ribbons Design Team and as someone who loves ribbon, how excited am I to be bringing you a monthly project using this crafting 'must have'!

This month we are looking at ways with washi tape, something which I have to admit to never having used before, but now that I have, I am quite addicted and can't stop thinking up ideas.

 I decided to make a box for my first project: in fact, I made one box and gift wrapped another  - and wow! This is my gift wrapping sorted from now on!

 I cut out my first box using  a simple exploding box template and chose to work with two different designs of washi tape from Art Deco and Cranberry and Gold collections, alternating them around the sides of the box.


I decided to  cover the inside of the box as well, but covered opposite sides with stripes and script and used a square of black card on the base to strengthen it.

The  lid is covered in the same way as the base, but I laid the tape in the opposite direction to give contrast. 

To finish off I made a bow for the top simply by cutting several  lengths of tape about 10cms and folding them in half to make them double-sided. For the little rose on top I took a length of tape (about 25cms) and folded it in half length ways. It's easier if you start off by wrapping it around tweezers or a pokey tool. Once you've got it started, ease it off and then just keep folding  to form your rose. You don't have to be accurate, if you leave some 'sticky' it will help it keep together. You may need a little glue to hold it, but all I did to finish was add a little glitter.
 The second box is a gift box, wrapped in brown parcel paper; I used  washi tape from Candy Floss for the wrap, finishing off with a flower made in the same way as the bow, but with more layers and I snipped the ends with deckle edge scissors and scrunched it up a little. I topped this with a sentiment and button threaded with a washi tape bow.

Box Template: Billie's Craft Room


That's all from my first project, hope you like it!

Carole Z X

Saturday 15 September 2012

Design Team Card, Emergency Crafters- Saturday 15th September

Hello Blog Friends,

We have a new, rainbow inspired challenge over at Emergency Crafters, so hope you will join in for the chance of winning a set of Christmas Promarkers!

The theme is colours of the rainbow, you can use the link above to hop over and see the inspiration from all the lovely DT members and here is mine...


I used a 6x6 card and created an aperture using Spellbinders Grand Scalloped Rectangles; as it is aimed at a teenager (as well as creating this as my DT card, I am sending it to my friend's daughter for her 13th birthday, the age was added afterwards), I wanted to make it as colourful and 'streetwise' as possible, hence the very bold use of Dusty Concord distress ink around the front of the card.

The Kenny K image was stamped on the die cut from the card and coloured with Promarkers. I have made so many projects with simply inking or using shimmer sprays and micas of late, that my lovely Promarkers have been ignored a little, never mind, I will soon pick up on my Christmas cards again and they will come into their own!

To keep with the rainbow theme, I made some paper bunting and again used my Promarkers to colour it in rainbow hues, matching this as close as possible with the ribbons. The final touch was a little touch of stickles glitter.

Thanks for stopping by, why not create your own rainbow card, scrapbook page or other paper craft project and join in with our challenge at Emergency Crafters ?

The prize this time is a set of Classic Christmas Promarkers


Carole Z X

Friday 14 September 2012

Workshop photos - Friday 14th September

Hello again blog Friends!


Yes, I'm back for a second time today, with photos from last night's Out of the Blue workshop...

This time we set two Christmas projects for our groups, a card and tag that, whilst we used dies last night, can be easily replicated using any embellishments, templates or stamps.

Both groups made cards from the same designs. These were the projects for my group:


A DL Christmas card, using a simple layout sketch, a tag made from using a luggage label as a template with cream card, which was shaded at the edges with Worn Lipstick distress ink, the Spellbinders Poinsettia die, some Cosmic Shimmer PVA (Olympic Gold) for the centre, a stamped sentiment and decorative edge using a Martha Stewart punch.


We also made a tag using the 2010 Spellbinders Globe ornament and again the poinsettia die. In case anyone really didn't want to make any more 'Christmas', I also gave the option of the heart tag, using Spellbinders Classic Hearts and one of my group decided to make this instead.

 Below are photos of some of our group of crafters with there completed projects...hope you all had a good time again ladies!

Carole X


Sunday Stampers Week 222 Colour- Friday 14th Sept

Good Morning Blog Friends!


I'm pleased you liked my photos of the Olympians yesterday and thank you for all your comments. It was a truly memorable day and yes, I was very emotional!

Yesterday we had a day at home catching up with work on the path around the coop in the garden, luckily the weather was glorious! Last night was our first workshop for this month (we have two this month). If any of my group from last night are checking, look out for a second post this afternoon, when I'll be posting the photos!

Today I am sharing my Sunday Stampers project for this week: an easy peasy tag, as I've not  had much craft time this week with us being on our stay at home hols! The theme for Sunday Stampers this week is colour - I was going to go for a  multi coloured smorgasbord,  but coincidentally I have a Design Team card to show over the weekend, which has a multi coloured theme, so for this one I chose one colour and that colour is blue, not shades of grey :), shades of blue...

I had some card left over from a previous project where I had used mica sprays over a mask, so I cut this into a tag shape and then using a  leaf stamp from Studio 490's Wendy Vecchi, Love to Make Art set, I stamped the leaf on the tag, using Broken China distress ink. I also stamped this leaf again on separate card and cut it out. Then I stamped the heart from the same set, on plain card,  dark turquoise paper, pale acqua paper with a tiny dotty pattern and a blue/white floral paper. I used these to paper piece the heart.

My final bit of stamping, was the wings from Sam Poole's Steam Punk Dreams dress form and a sentiment from Sam Poole's Art Sayings set. I then stuck the leaves to the back of the card, added a little piece of scrap from one of the cut outs and some ribbon to the top and bottom and covered the back with another tag to tidy.

Hope you like it! Thanks for stopping and leaving a comment! Check back after mid-day for news from last night's workshop!

Carole X

Thursday 13 September 2012

Olympic Heroes - Thursday 13th

Good Morning Blog Friends!

No card today, but I wanted to share with you the wonderful day Tom and I had yesterday, when we drove over to Bath to welcome home our Olympians and Paralympians who train at Bath University and make up, not only Team GB, but also Team Bath. Just like they had done in London a few days ago, they were all back for a parade via open top bus through the city and a Civic reception.

I managed to exchange a few words with paralympians Steph Millward (who was truly weighed down by her medals!) and Ben Rushgrove. It was quite humbling to be able to congratulate them in person, shake their hands and be able to hold their medals, which are really heavy. What a great day!

Hope you like the photos!

Carole X

Here I am, waiting for the bus!

The bus arrives...


A little girl holds Ben Rushgrove's Bronze medal tightly!

Above, Ben Rushgrove's Bronze medal and below the man himself


Steph Millward with all her Silver Medals

The Team photo call outside the Assembly Rooms, Bath